
14 Jun Water Filled Cofferdam Standing Water Installation Procedure
A water filled cofferdam standing water installation procedure for success. While deploying the cofferdam in a stagnant water situation, you can accomplish the installation with man power and minimal equipment usage. Moving water deployments differ from stagnant water deployments with the difference being heavy equipment involvement. The Detroit Tarp Water filled cofferdams come with many features designed to make the installation a breeze. This article will highlight successful installations advised by trained Detroit Tarp representatives and should only be used as a guideline. Every project is different so be sure to contact your Detroit Tarp cofferdam rep for further instructions at 800-457-5054.
Stagnant Water Installation

Identify the location where the water filled cofferdam will be placed. It is extremely important to survey the area and be sure to clear the area of any hazardous and foreign objects (sharp rocks, rebar, glass, logs and other damaging objects. )
During the site survey, locate the deepest location where the water filled cofferdam will be installed. Once that area is located take a few measurements to find the depth. Depth should be measured from a solid bottom, if there is silt, that will also need to be included in the measurement.

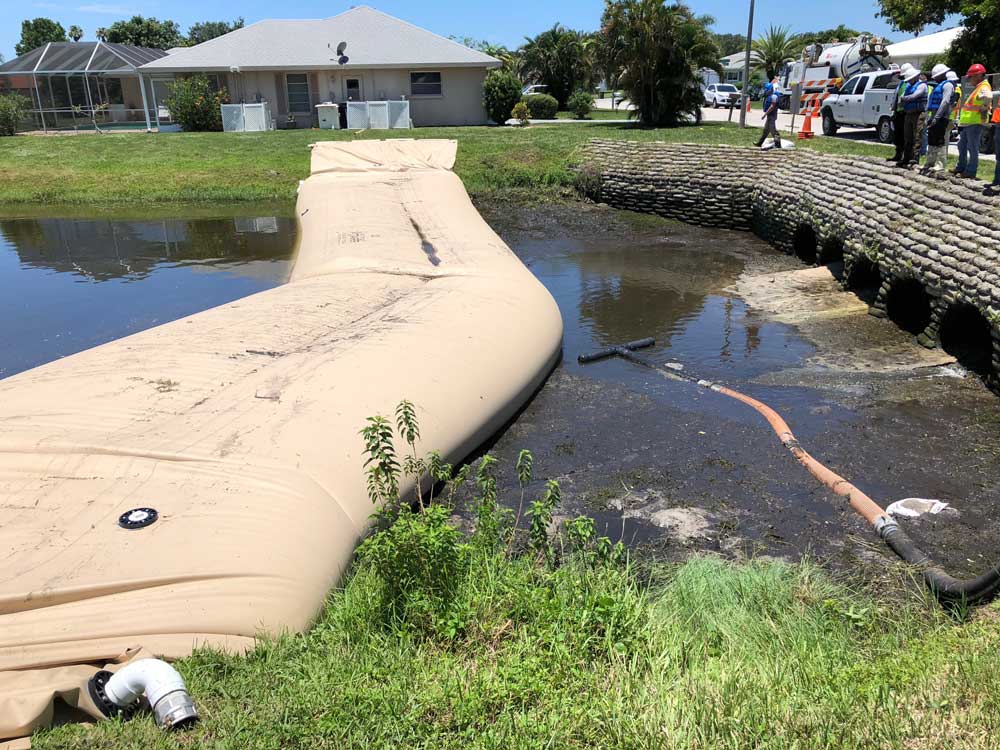
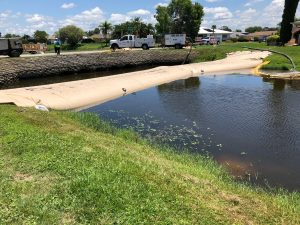
After the area is surveyed and the site has been measured and cleared from all debris, the installation can begin. The Detroit Tarp water filled cofferdams will arrive on a pallet as small as four feet wide by four feet long and can be moved to installation location easily with onsite equipment. The dam is in a roll form and direction of unrolling should be identified.
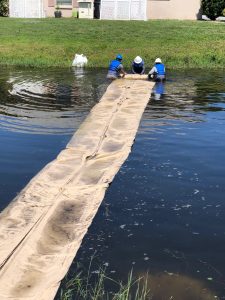
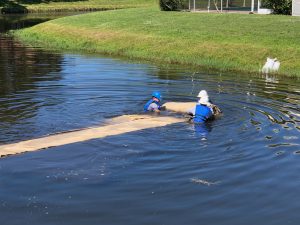
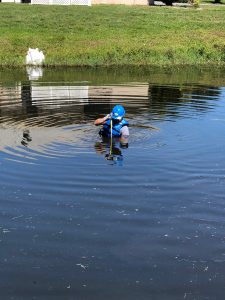
Place the cofferdam at the top of the bank near the water that the installation will take place in. Unroll the dam down the bank and into the water, once the cofferdam is in the water it will become buoyant and can be easily moved. Enter the water wearing the proper recommended PPE and begin to unroll the cofferdam in the desired path.
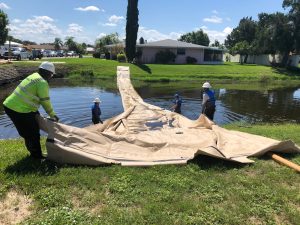
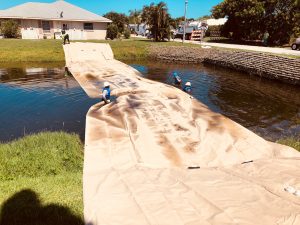
After the cofferdam is unrolled in the right location you will notice a series of folds. Unfold the cofferdam until it is opened all the way and laying flat. The dam is still buoyant and will float at the top or a few inches below the surface of the water.
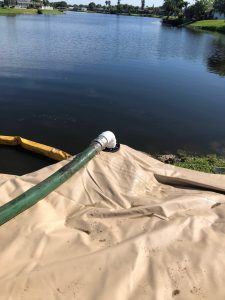


The water filled cofferdam is now in place and you can begin filling. Thread the 4″ PVC elbow provided with the dam into the “Fill Port” and begin hooking up your discharge hose. Prior to filling stake and tie off each end of the cofferdam using the pipeloop feature provided on the ends. Begin filling the dam, you will notice the water will begin to cover the top of the cofferdam. It is now sinking to the bottom for the body of water and will begin to rise out of the surface as if approaches maximum capacity. Enter the water and take a measurement from the deepest location where the dam is installed and measure for maximum height. When the cofferdam reaches the appropriate height you can shut the pumps off and take an additional height measurement of the cofferdam to ensure it is at the correct capacity.
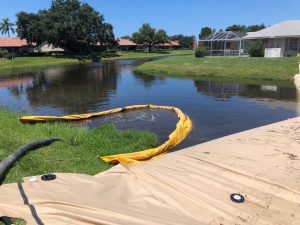

Disconnect your discharge hose from the water filled cofferdam and move it to the non dewatered side. Following all environmental procedures, begin the dewatering process until the worksite is dry enough that you can begin your project. Monitor the cofferdam height, water levels and possible movement of the dam multiple times a day. If there is any concerns call a STOP WORK and have all personal in the cofferdam area meet in a safe location to discuss. Every project is different and this is just an overview of a installation process so be sure to contact your Detroit Tarp cofferdam rep for further instructions at 800-457-5054. https://detroittarp.com/contact-us/
No Comments